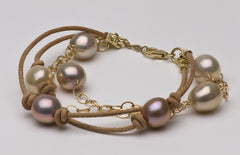
 I’ve been requested to make quite a lot of custom jewelry in this past month. We make custom pieces on a regular basis like selecting loose Tahitian pearls to make into a special strand in specific colors, quality and sizes, special length requests or to create one-of-a-kind items, often requiring us to team up with our custom jeweler and friend Takayas Mizuno.
Custom pieces can be quite challenging with many email communications with the customer and a time-consuming process, but it's very rewarding when the piece is finally done.
I’ve recently transformed a customer’s pair of Akoya stud earrings into dangle earrings. This pair of Akoya studs in a delicate 14K yellow gold setting was a gift from her parents and had a very sentimental value to her. But since she owned other pairs of simple stud earrings she didn’t wear them often.
The customer sent the earrings along with a pair of costume pearl earrings she liked. She wanted to connect a drop pearl to the stud earring. The first challenge was to find drop-shaped pearls that matched the color of the Akoya studs. Since Akoya pearls do not normally come in drop shape I needed to look into South Sea and Freshwater pearls. The Akoya pair had a very strong rose overtone over a soft ivory body color. I searched for very light golden south sea drops with a hint of rose. No luck. Even the lightest goldens were too yellow compared to the Akoya pair. Then I looked for freshwater drops and found few pairs that had strong rose overtones.
I sent a picture of the pairs and the customer chose the largest.
The next challenge was to solder a small jump ring on the customer’s earring finding to connect the drop pearl to the stud. After removing the pearls from the findings, I sent them to our custom jeweler, Takayas, who examined them carefully and advised that instead of soldering the rings it would be safer to get them laser welded. The jump rings were safely attached to the setting few days later and I assembled the earrings by wire wrapping the drop pearl and a tiny gold ball bead between the Akoya and the Freshwater pearls. The pair turned into a very delicate and elegant one-of-a-kind piece. The customer was very happy with the transformation and she is now looking into a new custom project.
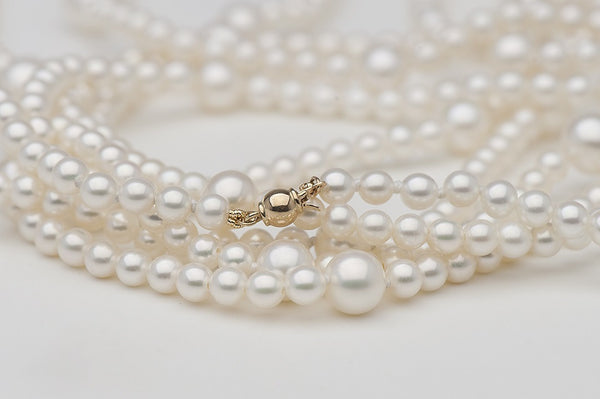
Since the movie “The Great Gatsby” came out, I have been busy working with rope style lengths. The last project I made was 100 inches with a specific pattern.
Our customer wanted a long length that can be wrapped many times around the neck but didn’t want to be weighed down. She also wanted a clasp for versatility.
The pattern she wanted was 2 inches of small pearls with 7-8 mm pearl, repeat it 3 times, and for the fourth pattern change the size to 8-9 mm pearl and repeat. I suggested using 4.5-5 mm freshwater pearls that I happened to have for editorial piece, and also suggested using a 5 mm ball clasp from my little h line. I wanted the pattern and the pearls to be the focus and didn’t want the clasp to be too distracting.
I made a mock up of the pattern for approval along with the clasp options. After several emails we have decided to knot only between the larger pearls so the necklace will not distort in a wavy manner by knotting every small pearl. The biggest challenge for constructing the necklace was to get the 8-9 mm pearl come right at the 50-inch mark without changing the pattern drastically.
It took me few tries to figure it out and I finally changed the pattern slightly in the beginning to make it work. The necklace turned out beautifully. I had just the right amount of 4-5 mm pearls and were able to match with our AAA pearls in 7-8 mm and 8-9 mm.
My current project is even longer. I am now working on a 144 inch rope in 6-7 mm Freshwater pearls. I have made few 120 inches in 8-9 mm before but this would be the longest strand ever made at Pearlparadise and the customer has requested photos every step of the way to completion.
The first step is going through our stock of 6.5-7 mm AAA pearls and selecting 8-9 strands of matching silver overtone. In order to make 144 inches we would need at least eight strands of pearls, but I'll also need to remove pearls that aren't quite AAA. We normally tape these pearls with blue painter’s tape and replace them with qualified pearls.
After the selection and rejection process is complete, I remove them from the temporary thread. All pearl strands are made so that they slightly graduate to a larger size at the center. We purchase 6.5-7 mm strands and the center area is where the pearls close to 7.0 mm are. I divided the strand in three parts: the first 6.5-6.7 mm/center section of 6.8-7.0 mm/the last section of 6.7-6.5 mm.
I took the first section from all 8 strands and combine them and do the same with just the center section and to the last section. This way the long strand will have an even graduation of sizes.
After the pearls are arranged in the correct order, they are ready to be knotted onto a new thread. I am not using our standard silk thread on this since the weight is an issue. I am using a polyester or nylon thread for strength.
Some of obstacles one faces when making such a long strand are measuring the right length for the thread, not tangling them (or untangling them when it does happen) and knotting them as tightly as possible - especially as the length grows.
Our customer has mentioned that this piece is not a unique design for a custom piece but a super long strand of pearls like this can do wonders with your wardrobe. It will instantly make a simple outfit glamorous!


